Vintage Workshop
Services for Brough Superior motorcycles and their contemporaries
|
Vintage Workshop Services for Brough Superior motorcycles and their contemporaries |
Rebuild (or rather reconstruction?) of a 1931 Montgomery Greyhound 680 cc ohv - a long story!
| After getting my side valve MX80 Brough on the road, I decided I needed
an ohv one. An SS100 being quite out of reach for me, I kept looking out for
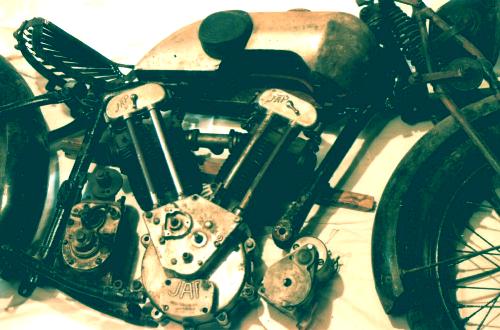
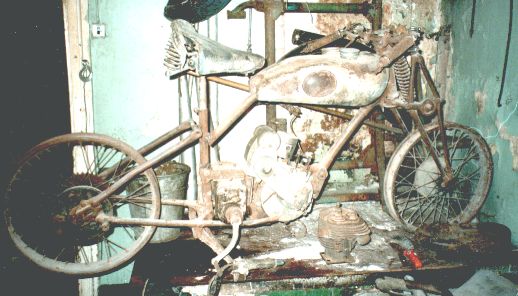
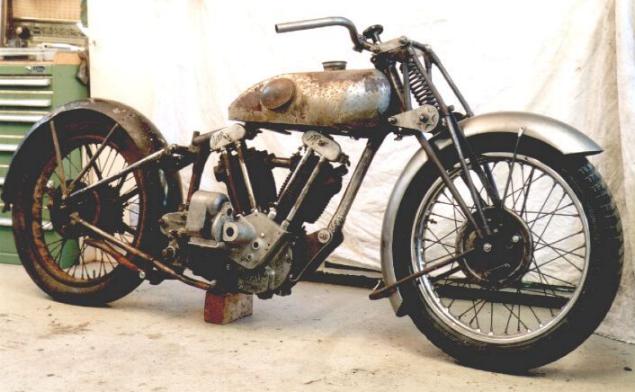
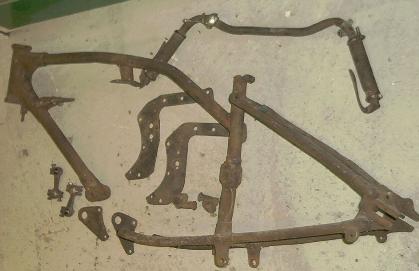
a 680 ohv project. For years, I could not find anything. A friend had mentioned to me that he had a frame, forks and sundry other bits of a 680 ohv Montgomery that he'd part with. So we agreed that if I'd find an engine I would buy the rest of his basket case. Another two years had gone by when an engine came up for sale in OBM. I gave the seller a ring, he told me that there was "nothing wrong with it that couldn't be put right" and I bought it on the phone. I better don't tell you what I paid for it... When I got the engine, I was rather disappointed with it. Cylinder barrels and heads with lots of broken fins, all the bits of the timing gear completely clapped out and the platform for the bevel-driven magdyno just sawn off. Well, at least the crankcases seemed fine. So I had another look at my friends Montgomery bits. What I found was not very encouraging either, but I decided it was a start at least, so I bought the heap of bits. This is what the parts looked like after I had laid them out on the ground to make the whole lot look like a motorcycle (and to give myself some motivation!)... |
|
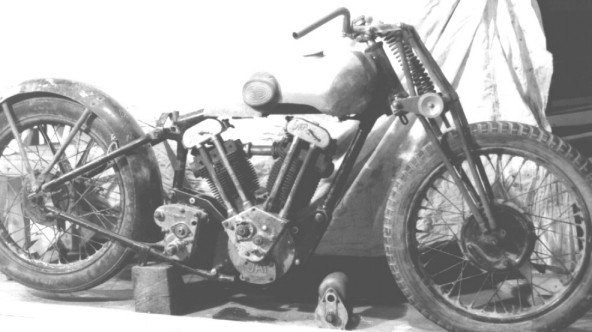
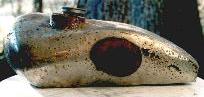
| Now, please don't tell me you never fell into this trap: I did some
research AFTER buying the bits. And I found, oh what joy, that the wheels
were not Montgomery at all. Neither were the forks, they had a slightly
wrong shape, but they were also too short in the headstock, which I
could have noticed earlier. The tank seemed to come from a ca. 1930 500cc single cylinder Montgomery, so that one was a near miss only, for a change.. And I learnt that the 680 ohv Greyhound never used a Sturmey Archer gearbox, but a 4-speed Albion one instead. My friend was a bit embarrassed about my findings and promised to find the correct forks and gearbox. The gearbox came up pretty soon, but forkwise modifying a set of Ariel forks was the nearest thing we could achieve in the next few years. So this was the status of the project some time in the early 1990's. The forks fit all right, but they don't have the right shape, there are still the incorrect wheels, the engine is still sans magdyno platform, and the plywood engine plates I had made permitted the bike to be put on the wheels but the engine position wasn't quite right... |
|
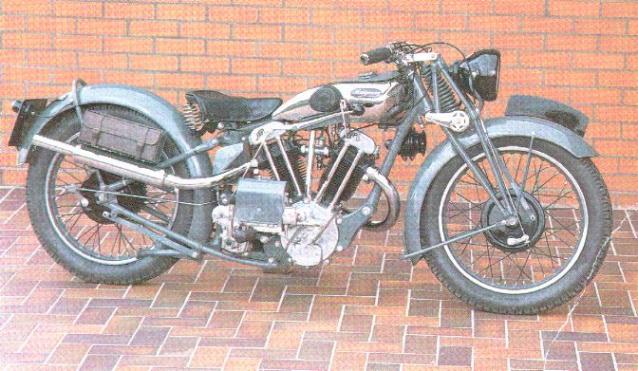
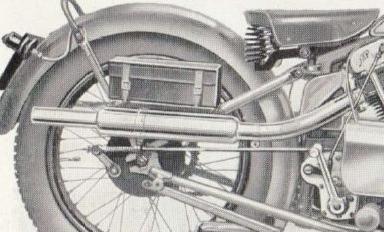
| This is what the bike is supposed to look like one day.
This bike is on display in the National Motorcycle Museum in Birmingham. I hope it wasn't too badly damaged in the fire in 2003 (?). (sorry for the poor picture, it is a scan from a postcard I carried in my wallet going to countless autojumbles!) |
|
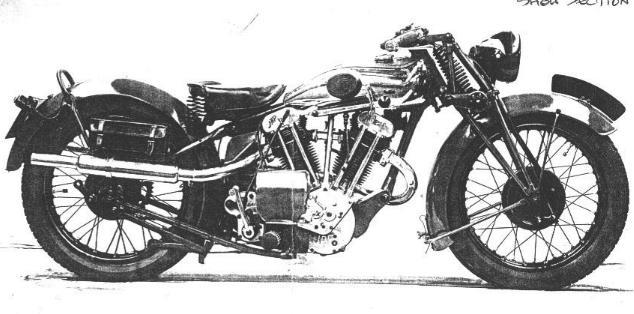
| I had my doubts about the originality of this museum bike, though, and
did some more research. In the end my doubts proved to be unfounded, which
became apparent when the late Brian Wooley dug out this picture from the
depths of the CMC archives.
It is obviously a photograph made for the Olympia Show issue of the blue 'un. It confirmed that the things I had questioned were indeed correct: the high level exhaust system, having the pipes fitted to the ports with clips instead of threaded nuts, the funny position of the toolboxes, the round footrests etc. In contrast to the NMM bike, however, this one seems to have an Enfield cush hub on the rear. Or at least a chain wheel with cut-outs like the ones on a Enfield hub. Another thing I did not like at all on the museum bike was the routing of the rear brake operating rod. A bent rod will always give spongy feel on the pedal, but it is difficult to avoid the bend, as the magdyno is where the rod wants to be. Now, most interestingly, it seems Montgomery's had not managed to solve this problem at all when it was time to deliver the show picture! |
|
| In 1999, Latvian enthusiast Juris Ramba came up with this picture of the
rather sorry remains of another Montgomery, a 1929 500cc sv "Bulldog" model.
After some negotiations Juris agreed to bring the parts to Germany on one of his next trips. He had given me a rather honest description of the parts, but even
then what I found was rather disillusioning: The frame had the seat lug and
top tube missing, with someone having made a crude attempt to make ends meet
by arc welding a few bits of tubing in. The engine appeared to be original
but it was incredibly clapped out and knocked about. The gearbox was held
together by a strap of iron forged around its broken case. We discussed the situation and struck a fair deal. At least the acquisition would donor two correct front fork blades and a usable Terry saddle! |
|
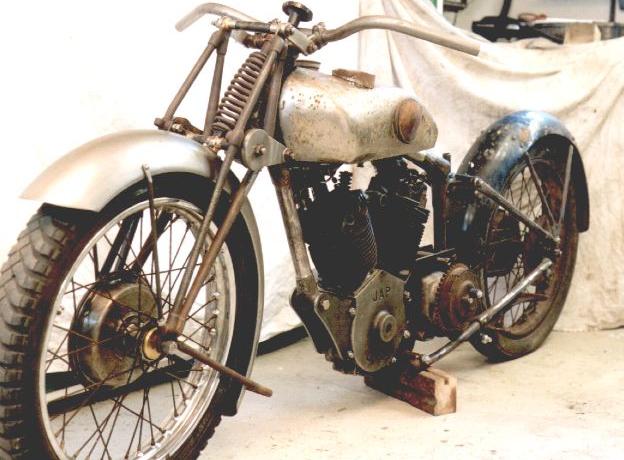
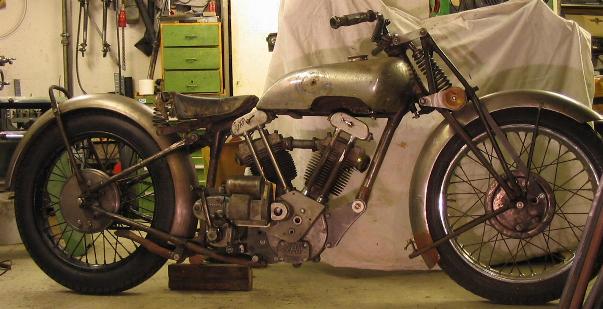
| 3/2000: The forks have given the
project a real push. This is how the bike looks now. Unfortunately the wheels from a "Bulldog" model are wrong for a "Greyhound" model, as the latter used 7" brakes instead of 6" ones. A good deal of work has been spent on finding and rebuilding a correct 7"
British Hub front wheel and on rebuilding the rather worn out forks. I went through 4 sets of plywood engine plates without getting their shape quite right. A big "Thank You" to fellow enthusiast Chris Ranieri for saving me from further trials by drawing me a pattern of his plates! The ones you can see here have been CNC milled to his pattern. And I made a new timing cover with magdyno platform. |
|
| There is still a bit of emptiness on the drive side.
I'd appreciate any hint leading to a correct primary chain case or even only a photograph of one. (This is the only item that seems to be incorrect on the Birmingham museum bike) Also an Enfield cush hub rear wheel would be most welcome. Should I fail to find one, I will possibly make a small batch of those Enfield hubs. Watch this space!
|
|
| 10/2004: I have given the frame,
wheels and tank of the bike to a Czech Montgomery enthusiast; in
exchange for a Sturmey and a second, unknown gearbox. It will be quite a demanding restoration. Petr, I wish you the best of luck in rebuilding it! Other than that, I have done nothing to the bike for the last 4 years. After acquiring a 680 o.h.v. Brough in pieces, I just had to get that one onto the road first! And then I got sidetracked into my SS100 replica project...
|
|
| 7/2006: Despite the SS100 project
ruling out much everything else, I have done some jobs to the Montgomery
recently. The rear wheel had gone to Petr in the above mentioned swap. This had made the bike a bit cumbersome to move about, or rather stationary... which gave me some motivation to go ahead with the rear wheel. So I made up a new Enfield cush hub for it, and I have also made a complete brake. The wheel is not laced up yet, but I hope to do that soon. By the way, Petr has had me a new fork spring made in the Czech Republic. Very affordable and nice quality. Unfortunately he told me this was the last one, as the maker's tired spring winding machine got broken in the process! |
|
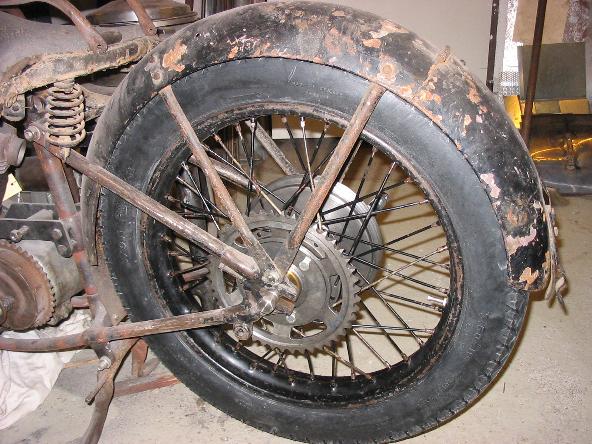
| 8/2006: Now, I have built a rear wheel around this hub. It is a temporary solution, using the old spokes from my 680 Brough and an old rim which seemed fair enough for the time being. The problem is that building a wheel with the hub and rim painted in the final paint shade and with the 100% correct spoke lengths and offset etc. is usually not possible before you had the bike completely assembled once. I think I will build the bike with stainless rims in the final, cosmetic build, but this wheel is certainly good enough to do some test riding before. |
|
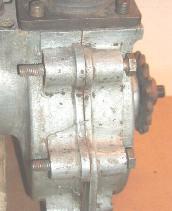
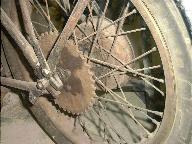
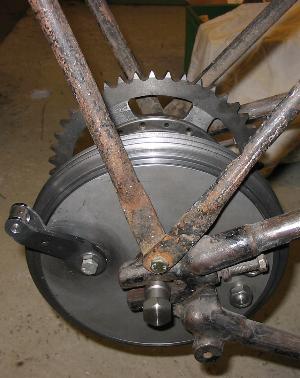
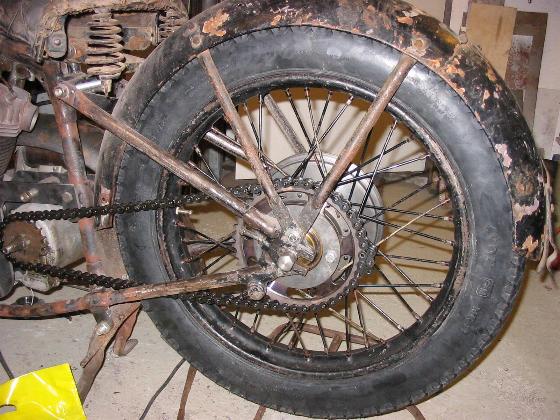
| 12/2006: The chain wheel on the rear hub had 45 teeth. Aiming for a 1:4 top gear ratio I got myself a 20 tooth gearbox sprocket (courtesy of Enfield India, this went straight on!). And I bought a piece of 3/8"*5/8" chain. But oh, my dear, what a nasty surprise I had when I tried to put the latter on the bike: the chain would foul the lower frame rail and the saddle tube bottom lug! Things would have been alright if I moved the gearbox a little more to the right hand side, but this is where the bevel driven magdyno wants to be! Now, using a 17t sprocket on the gearbox would have helped a lot, but I have no intention to go trialling on the Montgomery. I had to conclude the only way out was to use a smaller chain wheel on the rear hub, going for something like a 18/40t transmission ratio. So I had to make a smaller chain wheel, which was a bit of a problem. Here you can see the end result. Not a huge difference compared to the picture above, but now the chain can be fitted without being dangerously close to the frame. |
|
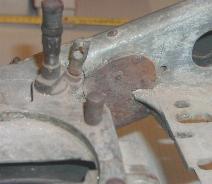
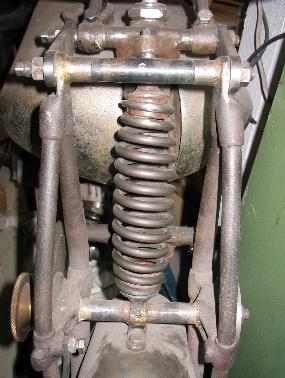
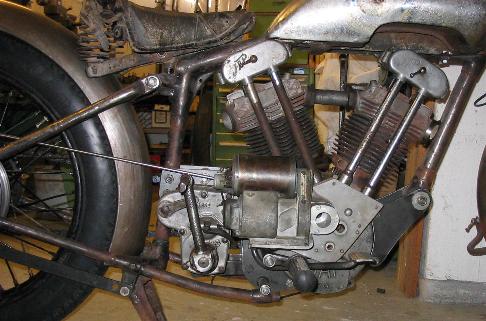
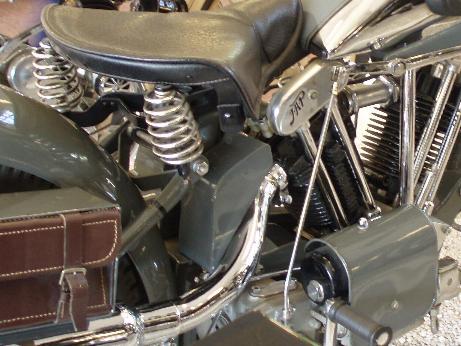
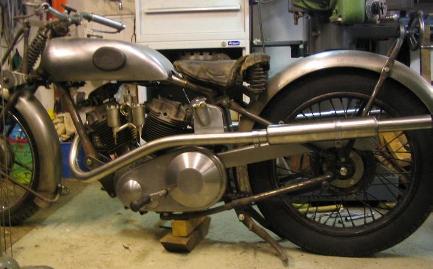
| Well, before I could really put the chain on I had to attend to the
gearbox as well.
Here you see it installed after giving it a bit of attention. This is the gearbox in the front most position of its adjustment range. You can see things are getting a bit close in the neighbourhood of the magdyno, but after all the research I have done I think this is what a 680 ohv Montgomery is about. On the National Motorcycle Museum bike, someone has resorted to modifying the clutch operating arm to face backwards, in order to avoid the conflict with the magdyno, but the period picture shows a setup like mine. It is close, but I think it is ok. |
|
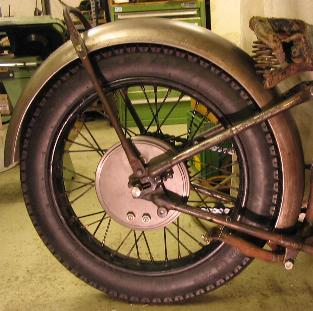
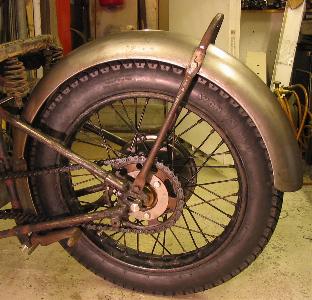
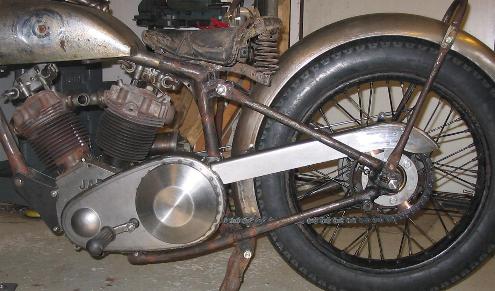
| And I fitted a new rear mudguard.
It took me the best part of a day to really adjust its radius to the size of the wheel and to make the cut-out for the chain. It is an interesting pastime to adjust a mudguard with the rear wheel in one position and then move the wheel a little... is there such a thing as an optimal position of the mudguard that will look good throughout the adjustment range of the rear wheel spindle? I ended up making the radius of the mudguard a little bigger, as otherwise everything save the centre position would look quite awful. It measures about 760mm tip to tip now, incidentally. The exercise told me that George Brough did not fit those nice valances for protection of the rider only! |
|
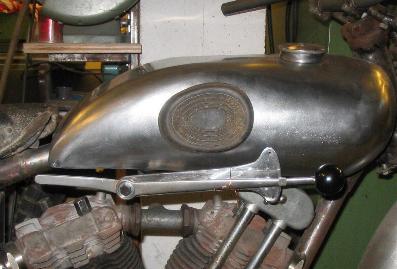
| 1/2007: So, this is where I am at the moment. I think one of the next steps is to have the tank replicated without the cut-out. And I will need to sort the problem area footrests/brake lever/primary chain case. The latter is a real dilemma... |
|
| ... but I have managed to solve it eventually (2/2007). I made a pair of footrests and a brake lever. If you have taken a look at the link given above you will agree that it is hard to tell what Montgomery's answer to the brake issue was, but I think mine looks like a neat and sound solution. Apart from the many iteration in the decision-making, fabricating the footrests and brake lever took me a while! |
|
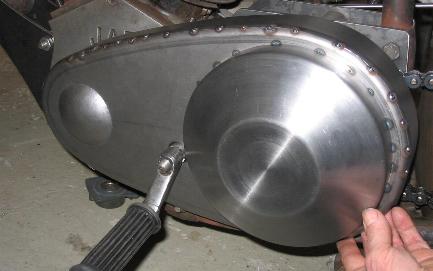
| 3/2007: If you followed the link about the chain case dilemma two rows above, you will understand that I had I hard time deciding what the chain case should look like. But eventually I made my mind up, and I have now started making the chain case. It was my first real attempt at doing some serious sheet metal work, so it might well be worth a look... |
|
| 5/2007: The primary chain case is
still not quite finished, as I first needed to make a
rear chain case, too... This proved not quite as easy as anticipated, but in the end I was quite pleased with the result. |
|
| Now, another missing tinware item is the oil tank. Unfortunately the
exhaust pipe of the rear cylinder wants to be where, on other Montgomeries,
the oil tank is. This makes for a somewhat complex shape of it, and means
you cannot afford any big tolerances in shape. This is a picture of the NMM machine. I am not sure if the restorer of this bike got the exhaust pipe all right, because boiling the oil is not the main purpose of an exhaust I think. Be that how it may, I had to make my own oil tank.
|
|
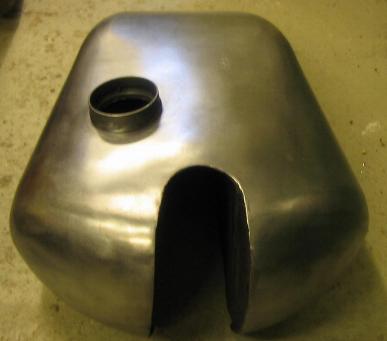
| 2/2008: I finally found some motivation (and courage) to go ahead with the petrol tank. |
|
| 2/2008: And, trying to sort out this quarter, I also went ahead making the missing gear lever. |
|
| 12/2009: For more than a year I just could not find time and/or motivation to work on the Montgomery. Now I have finally made a new start by producing a pair of silencers |
|
| 12/2009: Christmas holiday normally being a rather productive time for me, I treated myself to a set of new exhaust pipes this year. |
|
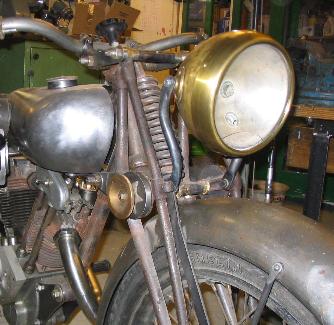
| 01/2010: As a start into the new year, I have fitted the H52 headlamp. Which meant making the struts from tubing. |
|
| to be continued... |
If you have any comments please send an e-mail to
![]()
(sorry, this is not a clickable 'mailto:' hyperlink. If you want
to write me, please type my address in your mailer. )