 Vintage Workshop
Services for Brough Superior motorcycles and their contemporaries
|
Vintage Workshop Services for Brough Superior motorcycles and their contemporaries |
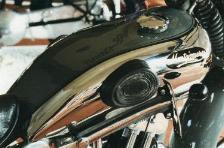
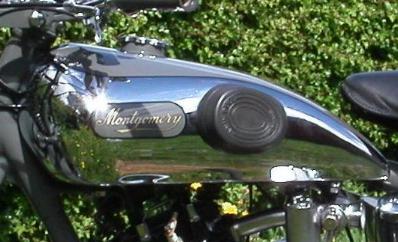
A petrol tank for the Montgomery....
| I have done a number of investigations concerning the correct shape and
size of the Montgomery's petrol tank. At the end of the day I was quite sure
the one on the NMM machine is correct.
|

 |
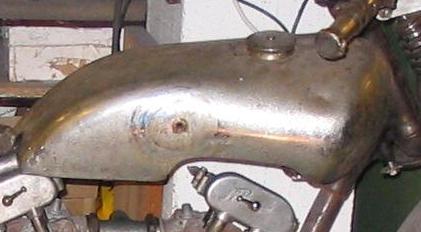
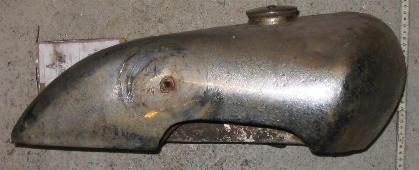
| Save for the cut-out at the r.h.s. bottom, the tank I have got seems to
have the same shape and dimensions, so I am wondering if I should try to
modify that one, rather than having a new one made. Well, my tank is not too
nice, really, as it has a number of dents, one fixing bracket is missing,
there is a hole in the bottom and the petrol taps are in the wrong place.
(NO, the hole is not where the petrol tap should be, by any chance!!) Looking more closely at the job in question, I realise it would mean
Altogether, a lot of work, considering the dubious outcome... |
 |
| 5/2007: I guess I will try to have a tank made.
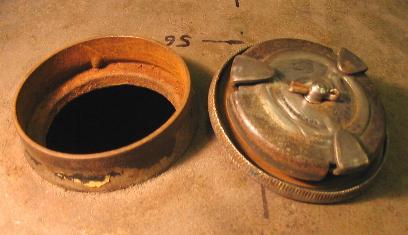
Now, this tank uses a rather special filler cap made by ENOTS, see adjacent picture. The cap itself is not completely unavailable, thanks to the fact that it was used on WD Matchlesses. The filler neck, however, needs to be made. Considering that, who is gifted at panel beating is not necessarily a wizard at the lathe, I thought it might be as well to pre-fabricate this item. One of the problems is the dimple inside the neck, which is giving one of the tabs on the cap a hold, so the inner bit is held while you turn the top to screw in the bolt to expand the tabs. |
 |
| I made a sketch of the neck. It is not very nice, but if you want it, have a click on the picture. |
 |
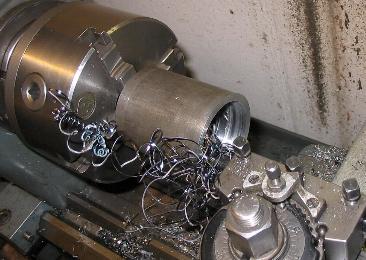
| I wondered should I try to spin the part from a piece of tubing, but
decided that making a partitioned mandrel would be quite a job in itself. So
I went for fabricating the neck from solid. Which means a rather
thick-walled tube... Unfortunately, thick-walled tubes are usually only available in horrible grades of mild steel such as St 34 - no strength but endless curls of swarf - a turner's delight, in short... |
 |
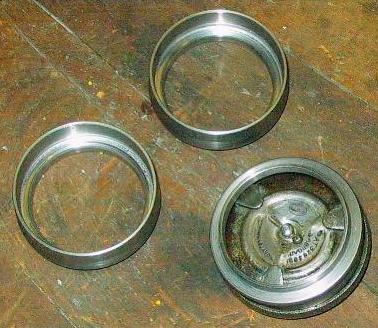
| Never mind, I made 3 of these necks while I was at it. One for the
petrol tank, one for the oil tank, and a spare one. I took a couple of hours
for the first one, but only half an hour for the last one. Now I still wonder how to make the dimple for locking the tabs... Punching it with a suitable tool from the outside (as it seems it was done originally) would require the material to be supported from the inside with a kind of die having a slot to limit the width of the area that is indented. Otherwise the operation might just result in making a nasty wide dent. Making the die is a job on its own, and I might have to sacrifice one of the necks as a test piece. I'll better have a night's sleep over this.... |
 |
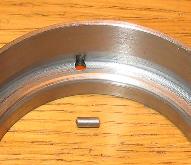
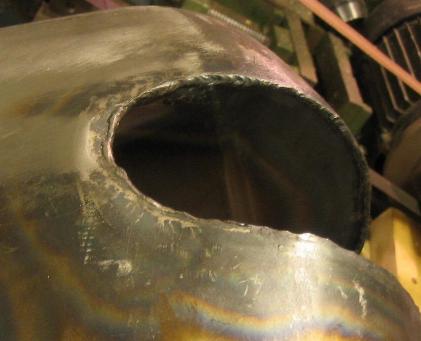
| Ok, I have slept a night over it and have decided not to go for the
risky denting operation, but to insert a small peg instead. I might have silver soldered it, but I don't know how the tank maker will join the neck to the tank, and I don't want the peg to come off in this operation. So I decided to drill a hole from the bottom an TIG weld it in... |
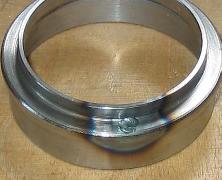 |
| ...which looked quite nice after cleaning the weld. |
 |
| 6/2007: In the page about the "primary chain case dilemma" I told you about the Montgomery rebuilt by Geoff Green. Geoff had a very nice tank made for this bike. He told me the man who made it had a fair share of trouble with it - I think he made three tanks until he got it right. I asked Geoff would his panel beater make another on for me. Geoff enquired, and his research yielded varying results, until about half a year later he gave up - the story being that the man had by then sold his house, stored the contents of his workshop in a shed and was then living on a house-boat "for the time being"... |
 |
| 6/2007: Another friend in England then came up with a recommendation. I spoke to this guy, found him friendly and reasonable (albeit a bit of a 'character', but what do you expect - this is England after all...). I sent him my old tank as a pattern with instructions what to replicate and what to change an hoped for the best. |
 |
| 10/2007: Well, a few phone calls and four months later I received my tank. Full marks on price and delivery time. Quality? Hmm - at a first glance the tank looked fine, but, alas, looking a bit more closely revealed a number of problem spots... |
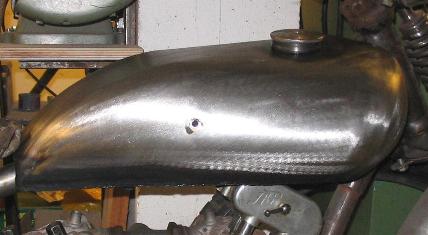 |
| Some of the welds were pretty rough and there were some small hollow
spots in the side panels near the bottom welds. The transition from the nose
to the side panels was a bit uneven and there was some distortion in the top
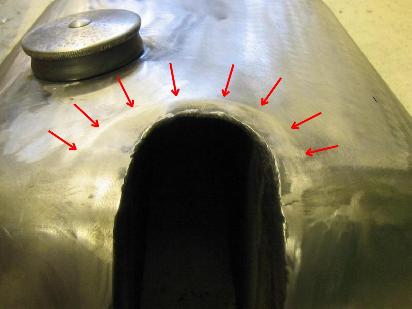
panel around the filler neck. What I liked least was the rather ungainly
hump in the top panel near the cut-out for the steering head, see picture.
Now you could argue most of the latter would disappear under the painted top panel, so you could even it out with body filler. But who wants to apply a thick layer of filler onto a plated surface, and just in a place where the tank is likely to get a knock or two when taking it of or putting it back on? Normally you would like the tank finished so well that you just need to apply a thin layer of primer and final coat directly onto the plating, with only a bit of sanding to give the primer some grip. |
 |
| 2/2008: I admit I was rather disappointed with the situation, and did nothing to
the tank for a further 3 months. Then I decided to make the best out of it
and try to save what could be saved.
I cleaned up the welds and worked on the smaller problem spots. Having another good look at it I still felt the most annoying feature was the strange fold in the top panel, indicated by the red arrows. I have no real experience in panel beating, or metal shaping, as I think is the more official name for this art. I signed up to the "metalmeet" forum to seek for help. For anybody interested in this art form, I can only recommend spending a few hours there, the address is www.metalmeet.com. You can see incredible stuff there, and certainly learn a thing or two! After explaining my problem I got a whole number of different really helpful suggestions, and a lot of encouragement. The main question was should I open the front seam or not. Two forum members encouraged me to try and cautiously hammer down the hump with a planishing hammer, arguing that if this failed, I could still open it. |
 |
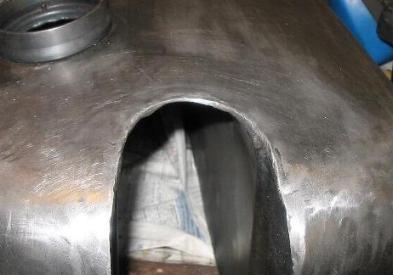
| I spent a long time hammering. Probably I was overly careful at the
beginning and did not perform any shrinking with the first 1000
blows...However, I was constantly aware that making a dent somewhere would
be a very-hard-to-correct problem!
I admit I was surprised myself seeing how the hump slowly came down! On the picture to the right you can still see a bit of unevenness where the fold had been, but generally things are looking quite nice already! |
 |
| I took up another piece of "metalmeet" advice and made myself a "spoon" to support the sheet from the inside. This enabled me to smooth out most of the slight wrinkle you can still see in the picture above. And I managed to level out the distortion near the filler neck, which was somewhere around the 2 or 3 o'clock position in this picture. |
 |
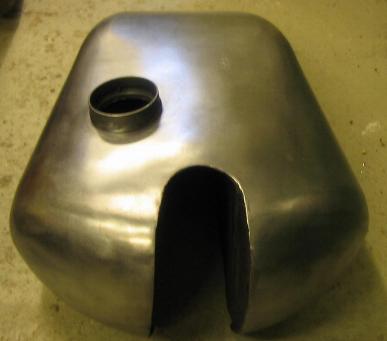
| A bit of gentle hammering here and there, and with only a slight bit of sanding, the tank came out rather well. |
 |
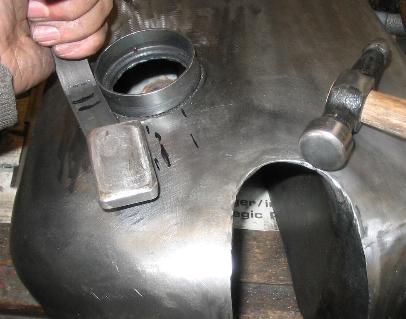
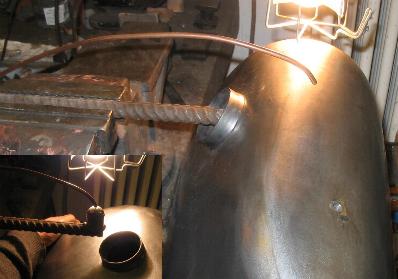
| I still had to remove a little dent in the right hand side panel. I had
made up the slightly odd contraption shown in the insert of the picture
earlier - it has been useful on a couple of occasions yet. The spider's leg
shows me where the dolly is moving inside the tank.
And, I am ashamed to confess it, I had to remove another dent in the left half of the tank! A dent that stupid yours truly knocked in all by himself, in having the tank falling over on the bench, hitting a piece of iron. Yeah, guess what, my dent remover does of course not work on the side opposite to the filler neck, so I had to bore a hole in the bottom of the tank to get at the dent...I could have bitten into my own a..e as we say in German! So I can just repeat to myself: HAVE A CLEAN BENCH AND A CLEAN MIND WHEN YOU HANDLE A TANK, AND NEVER GET INTO A RUSH!!! |
 |
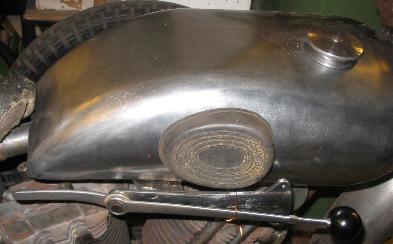
| Anyway, things are looking alright now. Here I am just trying to fit a gear lever to the bike, which is another story... |
 |
| to be continued... |
If you have any comments please send an e-mail to
![]()
(sorry, this is not a clickable 'mailto:' hyperlink. If you want
to write me, please type my address in your mailer. )