Vintage Workshop
Services for Brough Superior motorcycles and their contemporaries
|
Vintage Workshop Services for Brough Superior motorcycles and their contemporaries |
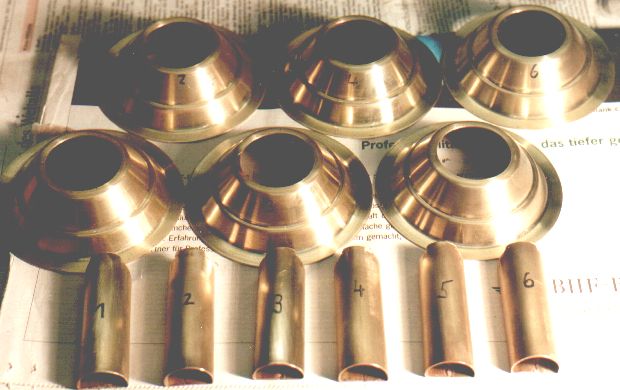
Re-manufactured LUCAS Tank Top Switch Shells.
This item was mounted on the top of the petrol tank on the 1928 to 1935 (?) Brough Superiors. It housed a standard Lucas light switch, the contact pattern depending on whether you had a 3-brush dynamo or already a CVC controlled two-brush unit. As far as I know it has been used on other bikes as well, maybe Raleigh?
update 3/2004: My friend Terry has asked me to make him one, and I have obliged. I took the opportunity to take a few more pictures so you can see what is involved.
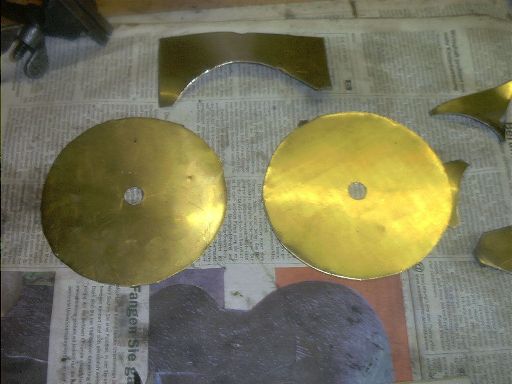
| To start with, we need some good brass sheet. I use a 1mm thick material, and cut a circular blank of 120mm diameter. |
|
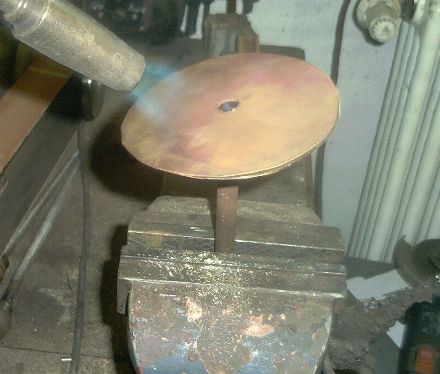
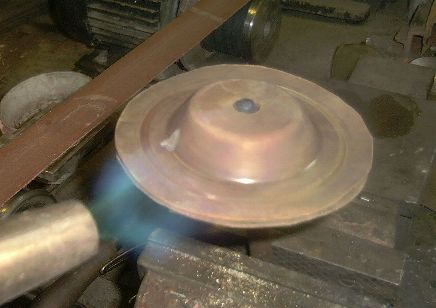
| The next (important!) step is to anneal the material. If you are lucky
enough you can buy it in a fully annealed state, but usually you have to
accept what you can get.
If the material feels springy, just heat it to medium cherry red and quench it in cold water. You need not hurry about quenching it; personally, I am not convinced you need to quench it at all, but it saves time. The disc should now be quite soft. It might be a little warped, but that is not a problem.
|
|
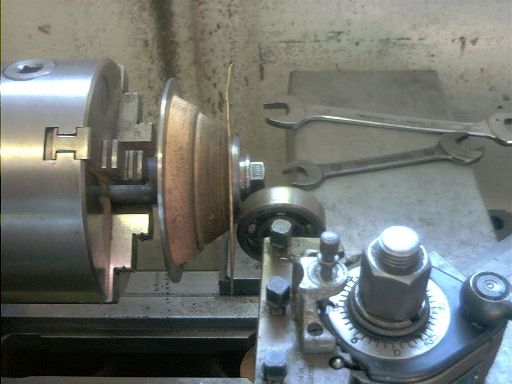
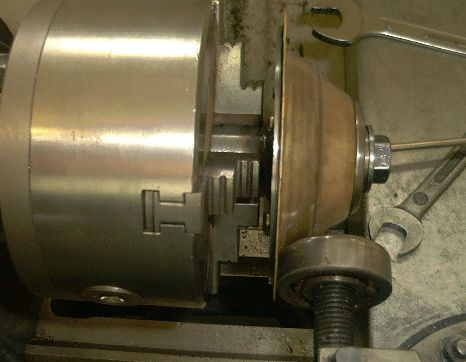
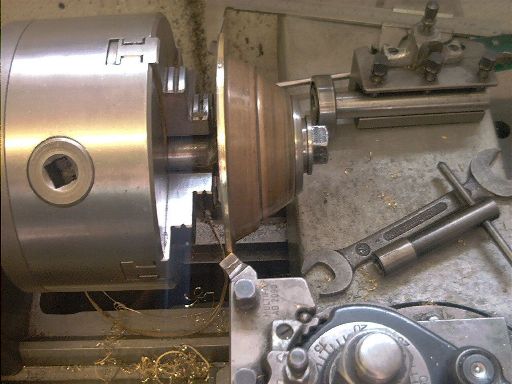
| Now enter the lathe.
I do not pretend to be a professional in metal spinning. These guys shape the work over the former core with a hand-held tool, if you have a chance to watch one of them doing it, go and have a look, this is really amazing! I use a hardwood former core which has about the inner dimensions of the final product. I clamp the disc to the face of it, using a big, sturdy washer. |
|
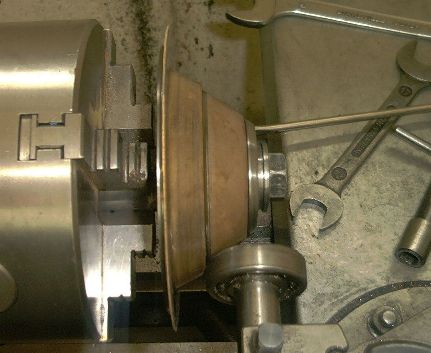
| For shaping the work, I use different old ball bearings the ends of
which I have radiused a little.
With the tool axis at right angles to the main spindle, and the top slide tilted to the correct angle for the top cone and some small clearance between the tool and the former core I spin the top cone, advancing the top slide from the position shown above to this one in one smooth go. |
|
| Now, important, afford the patience to anneal the bit again before going on. |
|
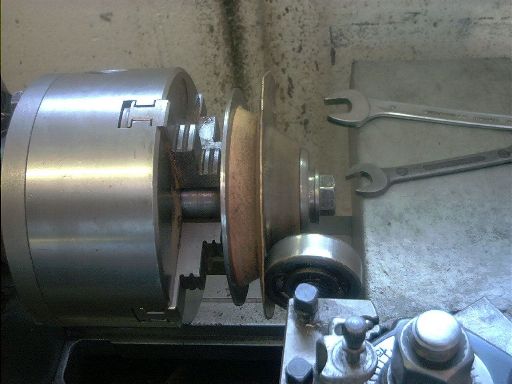
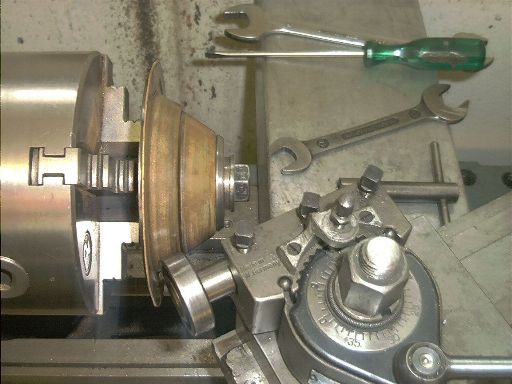
| Now it goes onto the core again and, with the top slide tilted to the angle of the lower cone, I shape this portion. |
|
| When I have not produced any cracks in the material up to now, I have
now got a fair chance to make up for this.
To avoid disappointment, I take a break and ... anneal again before I start! With a more sharply radiused bearing, I indent the bead between the two conical sections. |
|
| Using the same tool, but mounted in parallel to the finished surfaces, I
smooth out both cones.
I found that overdoing this will leave one ore more ridges that are near impossible to remove! |
|
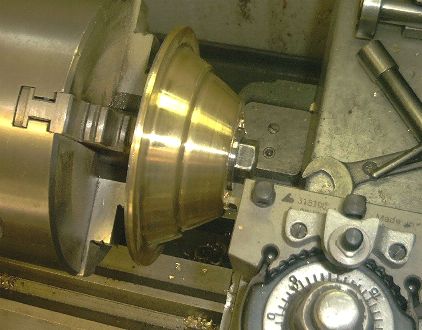
| When all seems still well, I cut the outer diameter. This is normal turning work again at last! |
|
| I am afraid the next step will not be appreciated by every well-bread
engineer: I clean up the whole thing with emery cloth.
I had an old spare lathe for jobs like this, but it had to go due to lack of space... I have at least one thing I can say to my defence: Please note I protect the machine bed with a piece of cloth. |
|
| With a special parting tool, I cut the hole for the switch finally.
This is a bit tricky, as you have to finish the right diameter while parting it off; clamping the finished thing to enlarge the hole is not an easy task! |
|
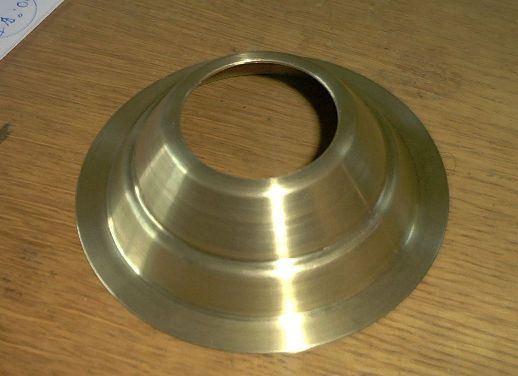
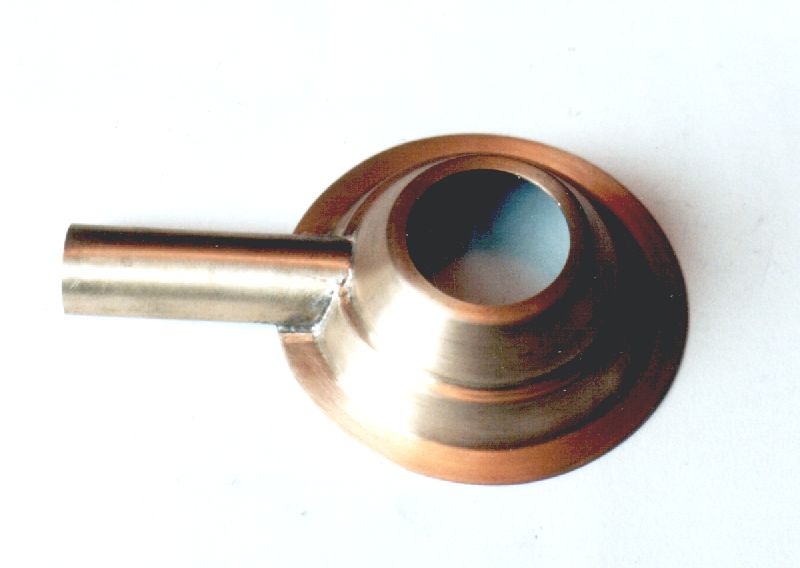
| Now, you just need to de-burr both seams and you have a nice little hat! |
|
| The cable tunnel is just bent from brass sheet. Making it fit to the round bit, however, is something you must have done yourself before you believe how long this may take! |
 |
| The tunnel is then silver soldered to the dome. If you are careful about
where you go with the flame, the flux and the solder, it is not a bad job to
finish the thing off, but once you have put a big blob of silver solder into
the corner it is the devil's own job to clean the mess up again!
I use a dentists drill to clean up the seam. The finished article is usually available from the Brough Superior Club spares scheme; if not, and you need one, please drop me an e-mail. |
 |
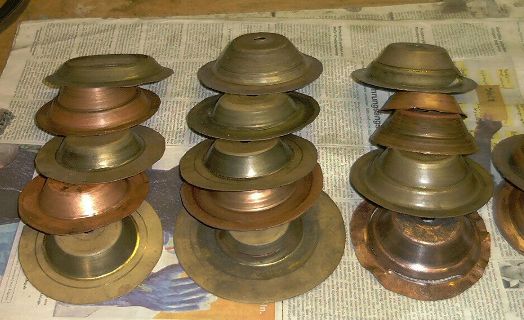
| You might have a go yourself, but be aware there can be disappointments.
When you stick to my instructions, you will not go through as much hardship as I did (having had nobody to ask where I was going wrong), but have a look at my sorry collection of rejects before you embark on this adventure!
|
|
For any kind of feedback my e-mail address is
![]()
(sorry, this is not a clickable 'mailto:' hyperlink. If you want
to write me, please type my address in your mailer. )