Vintage Workshop
Services for Brough Superior motorcycles and their contemporaries
|
Vintage Workshop Services for Brough Superior motorcycles and their contemporaries |
Castle forks front bridge last update: 03/2003
| I have been asked a few times if the front bridge casting is available
somewhere.
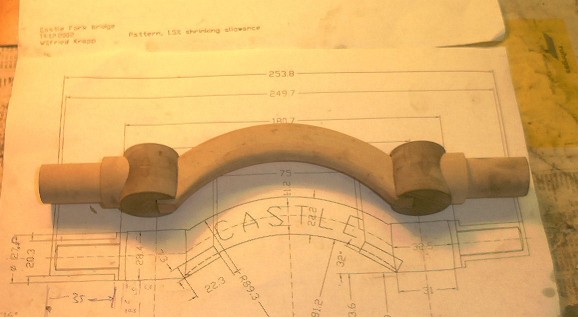
As I do not know anybody making this casting I decided to do a drawing of it. And make a pattern. Simple as it looks, it proved to be a time-consuming job, but what else could I have expected ? These are the basic bits, all produced by milling and turning and a little hand finishing. |
|
| This is how they look when they are loosely assembled. |
|
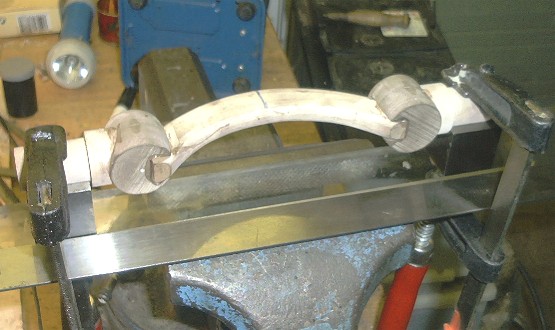
| I hate to machine a casting that does not line up anywhere, so I glued the bits together in a jig to make sure the ends were in line. |
|
| Next I cut the ears for the mudguard bolts and glued them on.
And the fillets wanted filling... |
|
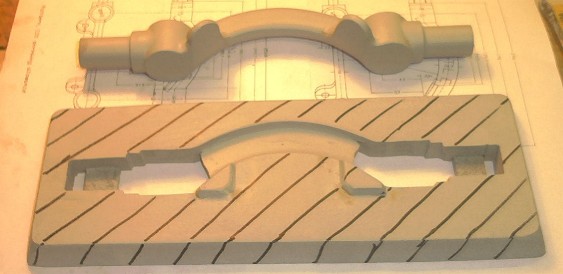
| If you do not make a split pattern, the foundry people will hate your
pattern unless you provide a "follow board", which is a jig masking the
undercut portions of the pattern while the first half of the mould is
filled.
Don't ask me how many times I tried the pattern in the follow board just to find the latter needed a little filing here and there! |
|
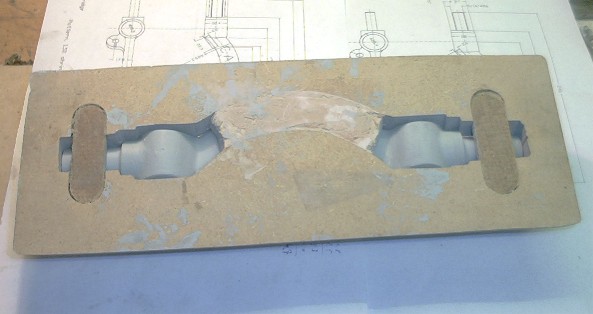
| And as this pattern is quite thin it needs to be supported in a few
different places while the first layer of sand is compressed. This is why I made the bed in the middle and the two supports at the ends. |
|
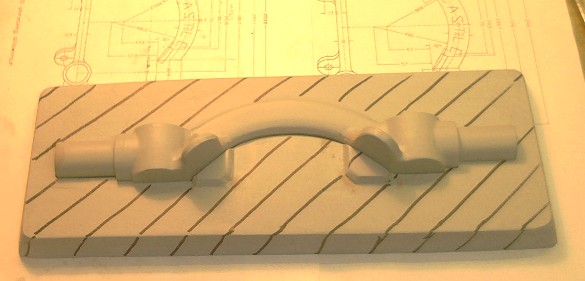
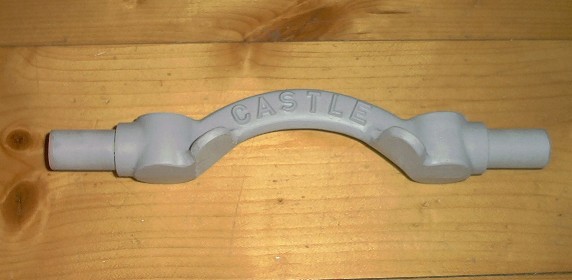
| So that's it, almost.
I will only have to put the magic letters on... |
|
| Ok, that's it.
Now I have decided that this item has to be cast in steel, for real peace of mind. Unfortunately there are not a lot of foundries around who are willing to do small lots and are able to cast a good quality of steel. So I had to accept a quotation that was beyond my worst nightmares... |
 |
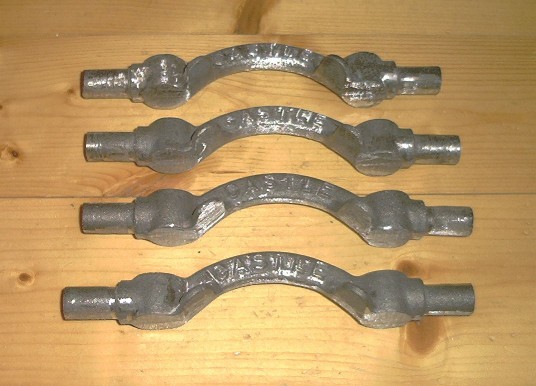
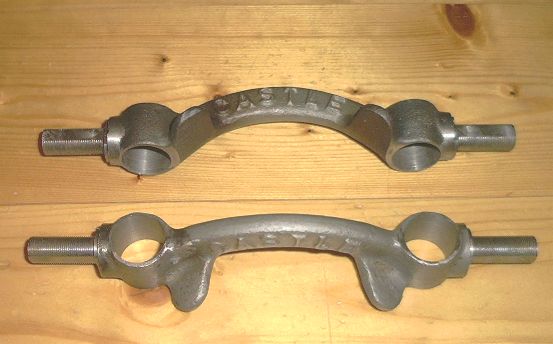
| But at least the castings came out very nicely.
This is GS52 now; a steel with 520N/mm tensile strength, and you can braze them as hot as you like. |
|
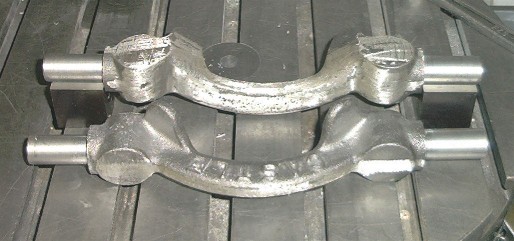
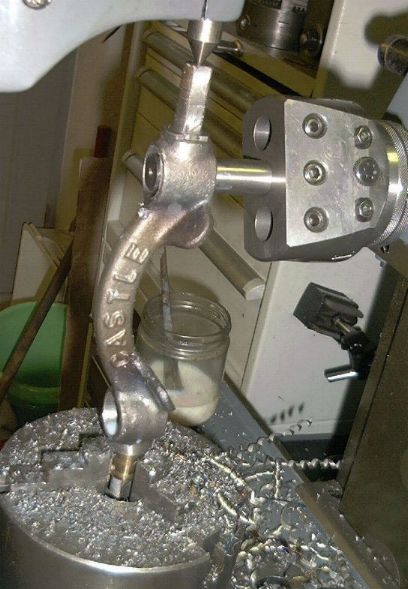
| Sorry, I did not think of taking pictures when I started machining them,
so this is after turning the ends.
It does not seem difficult, but boring a centre drill into the ends was not that easy... Now I wonder should I bore the tube holes when I do not know if I'll find the correct 1" tubing? |
|
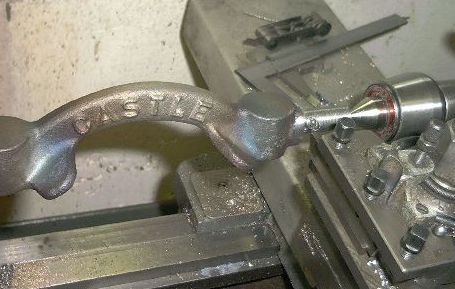
| So, next we have to make a 7/16 Cycle thread.
The blue ends? OK, Ok, shame on me, I made a mistake in my drawing (anyway, thank you Nick for putting me right!), and had to deposit weld a little bit for the flats on which the damper plates are carried. Good job it is a steel casting but anyway it did hurt my pride! |
|
| And then, mill the flats on the ends.
You might ask "Wouldn't it be wise to mill the flats first and do the thread then?" .... well, I tried both. Milling the flats across the thread means you have to clean up the thread afterwards, and you need a threaded bush to hold the threaded end in the chuck. But when you mill the flats without having the thread, you will (for
doing the second end) have to hold the end with two flats on it in the
chuck, and that is no good, neither with a 3-jaw nor with the 4-jaw. |
|
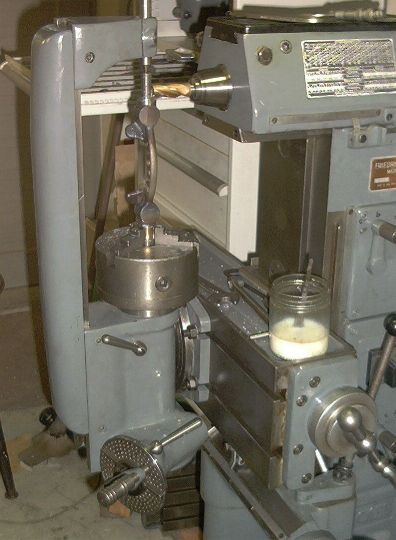
| Next, it is Wohlhaupter time again for boring the fork leg holes. |
|
| So that is that, but still a long way to go until you have a pair of forks! |
|
| to be continued... |
Any kind of feedback to
![]() is
appreciated
is
appreciated
(sorry, this is not a clickable 'mailto:' hyperlink. If you want
to write me, please type my address in your mailer. )